

Film product detail beautifully: light, focus and continuity
Make important details readable without distorting colour, geometry or the demonstration.
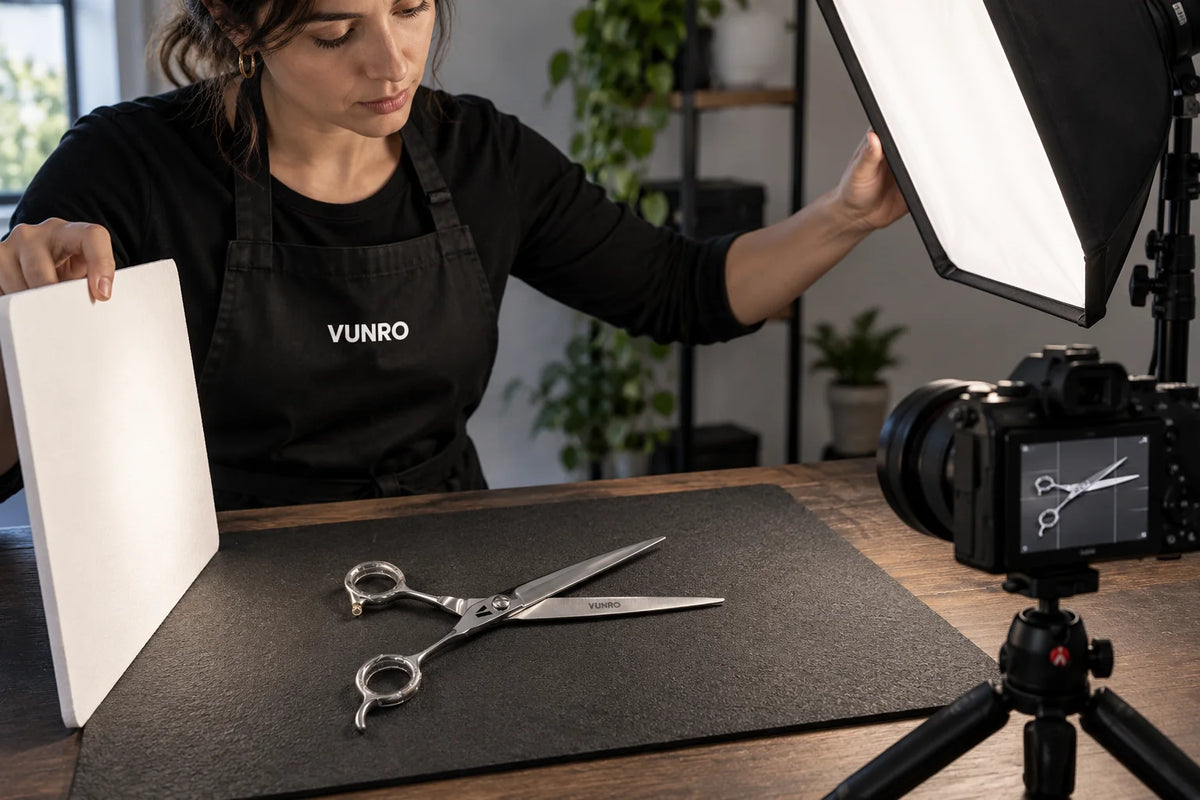
Creator filming series · Lesson 7 of 9 · Advanced
Advanced filming is control with a purpose. Beautiful light matters when it reveals the tool's actual construction, fitting or handling. A dramatic image that hides the useful detail or changes the product's appearance is less valuable than a simpler accurate shot.
Use this lesson after your phone setup and basic edits are reliable. Work on a static bench subject first. You can practise with existing lights, window light and cards. Buy equipment only after you identify a specific limitation that cannot be solved by changing the setup.
Choose the detail the viewer needs
Write the purpose of the close shot: identify the fitting, show the marking, explain a grip or reveal the real finish. Select the angle that makes that information visible. A close image of a shiny surface is not evidence of blade fit, cutting performance or durability.
Use the actual product. If you are explaining comb pins or blade teeth, resolve that detail in the real recording. Do not use a generated close-up as if it documents the tool's mechanical construction. If your camera cannot show the feature clearly, use an appropriate genuine photograph or a wider explanatory shot, with permission and correct attribution.
Build a controlled light setup
- Place the safely supported product on a plain, non-slip surface.
- Put a broad soft light or softened window to one side.
- Position the camera so the useful feature is visible.
- Move a white card to lift a dark area, or a dark card to make a bright edge easier to see.
- Record a test and compare the file with the real product.
On polished metal, the reflected surroundings strongly affect what you see. Move the light or card before changing the product's colour in editing. A broad reflection can show the shape more clearly than a small bright hotspot. Keep the authentic silver, brass or rainbow finish; do not make an ordinary metal tool look like a different material.
Make one adjustment at a time and record the result. Mark the working positions on the bench or floor if safe. A photograph of your setup helps you recreate it later. Keep lighting stands, cards and cables away from handling routes and sharp edges.
Control focus for the actual movement
Focus on the feature you want the viewer to inspect, then check the whole action at full size. If your hands move the tool towards or away from the camera, it can leave the sharp area. Either reduce unnecessary movement, refocus between takes or use a suitable supported camera setting.
Some cameras allow manual aperture and focus controls; many phones offer a different range of controls. Do not assume one menu or setting exists everywhere. If using a camera with adjustable aperture, test whether more depth of field helps while keeping sufficient light and a clear image. The test file decides, not the number alone.
A deliberately blurred background is useful only if the important product detail remains sharp. Do not focus on a face while the small fitting is unreadable. Avoid a cinematic effect that creates false edges around fingers, hair or comb pins.

Match cameras before the useful take
If you use a wide camera and a close camera, check both under the same light. Match their recording frame rate where practical and make exposure and colour consistent. Record the product in each view so you can compare identity, colour and detail.
Record a clear synchronisation cue before the action, when safe. Keep the main demonstration truthful and continuous where needed. A second view can explain what happened; it must not disguise a missing step or imply a result from another session.
Choose one audio recording as the main speech source. Check that it stays aligned with the action after editing. Listen at several points through the finished file, especially if the recording was long. A synchronisation clap alone does not prove there is no later drift.
Keep visual continuity
Between takes, note the product, fitting, orientation, hand position and surface. If a tool changes, explain the change. Do not accidentally cut from one blade system to another while presenting a single setup. Keep real sizes believable; a close crop should not imply that a small blade is a large device.
Maintain a simple continuity sheet: clip name, exact product, action, view, what changed and whether the take is usable. This is particularly helpful when shooting portrait and landscape versions separately. It protects you from editing attractive but incompatible footage together.
Use slow motion carefully
Slow motion can help people inspect an action only when the source recording supports it and the subject remains clear. Keep an ordinary-speed view when speed matters to the explanation. Label a slowed demonstration where it could otherwise mislead.
Do not speed up a groom to imply a product works faster, or smooth away signs that a shot was difficult. A fair measured time comparison needs clear start and end points, comparable conditions and an explanation of changes. Without that evidence, keep the description specific to the session.
Practice: one feature, three lighting choices
Film one switched-off, safely supported tool under three setups: direct existing light, softer light and softer light with a reflector. Keep camera position and the product unchanged. Choose the version that reveals the feature accurately, then explain why it is clearer.
Next record a wide shot and a close shot of the same safe bench action. Edit them into a short explanation while retaining product identity and action order. Review the details against the real tool rather than comparing only the attractiveness of the clips.
Advanced release checks
- The selected detail is genuinely visible and correctly identified.
- Light reveals the real material and shape.
- Focus holds for the necessary action.
- Multiple views agree on product, sequence, colour and sound.
- Slow motion or edits do not imply unsupported performance.
- The full master has been watched at normal speed with sound.
Advanced work should make the answer easier to understand. If a simpler shot does that better, use it. Production polish is valuable when it serves accuracy and the viewer's decision.

Keep learning
More from the Blade Blog
Explore coat care, equipment guidance and practical grooming routines in the complete guide library.
Browse all grooming guides →


